

In the 1990s I submitted two articles to the American Rose Society. But when they changed their website from ars.org to rose.org, my articles got lost. I still have the old link to one of the articles, but it goes nowhere. So I decided that twenty plus years later it was time to update one of my articles for the way I garden today.
Call it Roses Thrive on Routine 2.0 .
I am now a zone 6A rose enthusiast. Sometimes on some websites, I pop up as a 6B. I used live in suburban Philadelphia, Pennsylvania on the “Main Line”. Now I live in Chester County, Pennsylvania.
I planted my first rose bush with my father and paternal grandfather when I was fairly little. The rose bush was a Hybrid Tea called John F. Kennedy (my late father’s favorite rose and still one of the most majestic white hybrid tea roses when you can find it), and I have been in love with roses ever since.
My roses used to be my ultimate garden obsession as well as my favorite garden element. They still are a favorite, but as I have grown as a gardener and as my gardens have changed over the years, they have become part of the garden, but not the center of the garden as they used to be. Some years are better than others growing them. That is just the way it is, as it is for other plants in my garden.
When I wrote the article my garden was my parents’ garden. I planted and maintained that garden based upon what my mother preferred, which generally speaking was white and pale flowers, à la Sissinghurst, Vita Sackville-West’s garden in the UK. (Who was Vita Sackville-West? She was an English poet, novelist, and garden designer who lived between 1892 and 1962.)
In my opinion, routines work as well in the garden as they do in the house. I have
a few basics that would be my pleasure to share. I have updated this for my current best practices.
Once you have established a routine in the garden for your roses, you will not be able to imagine how you could live without a rose or two. When I first wrote this article my then garden has 51 rose bushes. Today I have around ten, depending on what made it through the winter.

Rose Basics:
I believe in good mulch for my roses. Back then I used to only use licorice root and cocoa hulls (please note that cocoa hulls can grow a fuzzy layer of mold when it is damp, which is unsightly, but has never harmed my plants), or buckwheat hulls mulch. If I couldn’t get licorice root, I looked for a good triple-shredded mulch. I lived on the Main Line and I not have a garden half in the woods so today I used two things predominantly: wood chips my arborists chip down from my own hardwood trees and shredded and not shredded leaf mulch. Thanks to listening to Jenny Rose Carey at a lecture last spring I discovered the fun of having a leaf shredder. The one I purchased is by Worx and is rated number 1 in reviews and is very reasonable in price.

Worx brand leaf shredder
I still mulch twice a year: in the spring for the growing season, and in late fall to provide a winter blanket. In the spring, I USED to remove as much as possible of the old mulch from the winter and previous summer, and apply approximately one-and-one-half to two inches of mulch everywhere. As what I am using now (hardwood chips and shredded leaf mulch) enriches my soil and breaks down beautifully, I no longer have to remove my old mulch.
And if you buy triple shredded mulch from someone , for God’s sake do NOT use COLORED mulch. That dyed stuff is awful. It doesn’t break down properly and the dye will get on your hands and feet and clothes as you garden and on your pet’s paws, babies’ feet and so on. I also no longer use the cocoa mulch ever because dogs eat it and as that is what chocolate comes from and chocolate is poisonous to dogs, I have erred on the side of caution. Besides the fuzzy mold that would grow got to be a bit gross.

I want my roses to breathe, so there is an approximately five-inch magic circle from the base of my rose that only has a peat moss “jacket” (a jacket to me is peat moss only), but no mulch. In the late fall when I apply my second mulch dressing, it merely goes over the old mulch and covers the crowns of my roses. This is where I especially like the shredded leaf mulch now. It is light and fluffy on my flower beds. Every plant benefits, not just my roses.
 As far as my soil goes, I used to follow the same routine every year. Now, I work any of the following ingredients into my rose and perennial beds depending on what I think is needed: peat moss, dehydrated cow manure, cottonseed meal, green sand, dried blood, bone meal, and some iron sulfate. I also like the lobster compost, chicken manure and mushroom soil.
Lobster compost is a newer obsession. It is made with chitin and calcium-rich lobster shells, compost and peat humus. The result is a dark-brown, complex soil that drains well and is ideal for conditioning beds and borders, vegetable gardens, herbs and annuals! The stuff I buy is usually made by Coast of Maine. Coast of Maine sells great products and if you look (or ask them) they can tell you locally where to find their products or on Amazon.
Minus the peat moss, you will find most of these ingredients in their chemical form in a granular rose food. Most of these granular foods and separate ingredients can be easily located at your local garden center or hardware store. For those who feel most comfortable with a pre-mixed granular, I would still strongly recommend also including soil amendment as needed. It is always important to keep your soil happy. Happy soil equals happy rose bushes!
 After the soil is amended when needed, I apply a weak epsom salt tea to encourage new basal growth. I am always careful to use epsom salt judiciously because it is not a good thing to build up too much of a magnesium residue over time. When magnesium is built up past the essential mineral level, it can stunt growth instead of helping boost new growth. This is why that throughout the growing season, I will give my roses and perennials and annuals a boost with Irish Organics Humic. It is one of my favorites – it is a kelp (seaweed) and peat mixture from the bogs of Ireland. This is my friend’s product and I was a test garden early on when they were first bringing it into the US. It is incidentally, certified organic in the US. (OMRI)
Once my roses have shown me at least one and one-half inches of new growth each spring, I dig in my granular feed. I will tell you I use a systemic granular feed that has insecticides and fungicides. I usually do this around Mother’s Day because where I live that is when the danger of frost is mostly over.
Then , I apply a little more peat moss and then my mulch. Also, whenever I have banana peels, I use them into my rose beds. Banana peels are the true junk food of roses!!! They love the boost a banana provides from potassium and other elements contained within the banana and its peel. I learned about Banana Peels from Old Wives Lore for Gardeners by Maureen and Bridget Boland. You can still find these books on Amazon and Ebay and from other used book dealers. They also recomeend beer for hollyhocks. It’s a fun book.
I have learned to make my old banana peels into a rose smoothie, so to speak.
I used to dig the peels in around the base of each bush, but given the critter population living with woods and farmers’ fields I have developed a rose smoothie which I dig in around the base with a small spade I use to transplant seedlings.
 The formula for the smoothie is I collect a bag of banana peels and keep them sealed in a plastic bag in my freezer until I use them. Then I rough chop the peels and toss into the blender with whatever spent coffee grounds I have on hand and a couple of cups or so of very warm tap water. (I never drink flavored coffee and I would never recommend using artificially flavored coffee grounds. I don’t know how the artificial flavor chemicals would affect the plants.)
The consistency of this smoothie for rose bushes should be on the thick side , but pourable. I don’t take my blender outside I pour the goop into a plastic pitcher. I then go around to each bush and dig a few ounces in around the base of each bush. I have a standard sized blender and only a few rose bushes right now, so one batch of rose smoothie is all I need every time I do this.
I will feed my roses this concoction every two weeks until Labor Day. Sometimes I am not so religious about this as I have a large garden, but I try my best.
As far as pruning, I have these thoughts: everyone should own a good pair

Ratchet-action pruners
of pruners used only for their roses and own a good, basic, descriptive rose book. I am partial to ratchet-action pruning anything these days, in addition to the bypass pruning shears. And pruning shears are not indestructable. I have some old-school by-pass pruners I

Bypass pruners
can still get sharpened if I can find someone to do it, but the others? Like vacuum cleaners they have to be replaced every few years.
Pruning is such a visual thing to learn, and that is honestly how I learned: descriptions, photos and diagrams. I purne from around Halloween into November, and again lightly in mid to late March when I can see what the winter damage was. And keep those pruning shears clean!
With my roses I have also learned a lot from Monty Don, who is has several English television gardening shows including Gardeners’ World (in the US we can get this on streaming services a little bit but not all of the season), writer and speaker on horticulture. My other main go-to source is Fine Gardening. Fine Gardening is the best U.S. based gardening magazine and buying a subscription also gets you unfettered online access to their articles and tips and so on and so forth.
I will use an old toothbrush just for the purpose of cleaning my hand held pruning shears . I mix a weak solution of bleach and very warm water in a metal bowl. I use the toothbrush to thoroughly clean them . Then I rinse the pruners well under running water and wash them again with a little mild dish soap, rinse them again
and dry them carefully.

These gauntlet gloves are by Fir Tree. I own a pair of this brand.
Also, do not forget to invest in good gardening gloves. When dealing with roses, average hand covering only gardening gloves won’t do. You need gauntlet gloves. I will also note I go through a LOT of regular gardening gloves in a season. But the gauntlet gloves I bought are now into their fourth year and still in great shape. I bought the Fir Tree brand on Amazon. It was just dumb luck that I discovered them because until I bought their gloves, I was destrying gauntlet gloves at a rapid rate too. I should also note that the things I recomeend I buy from the companies. I am not a compensated blog.
Now how about planting? Let me also state that I do not grow those knock out roses. They are not roses to me. They do not even really have a scent. I have mostly David Austin roses today plus a hybrid tea (John F. Kennedy my first rose) and a Queen Elizabeth, which is a grandiflora.
I used to plant a lot of different kinds of roses (modern and antique) but in this garden, my favorite shapes and smells are the David Austins because they combine old roses with the new and as my space is limited on sun in this garden, I want roses I know will perform well. And an added bonus for me is that with David Austin roses I can buy own-root roses. They are not grafted and I find that a bonus because I did have an instance where a rose died and I thought I had gotten all of the root stock out but I hadn’t and I am still getting rambling rose rootstock popping up every couple of years that I do not want and do not have room for. Own root roses are the same plant above and below the soil line. I find it makes a better rose bush. New canes (rose branches so to speak) can be grown from the rootstock without fear of the grafted rootstock taking over.
When planting a new bush, I always dig my hole at least eighteen to twenty inches wide, and at least as deep. If the soil has a large proportion of clay, then I add
sand (or green sand), gypsum or Chicken grit (which is insoluble stone – often granite or flint) or ground up Oyster shells, lobster compost/dehydrated manure/mushroom soil (just depends what I have on hand at the time) and peat to break it up thoroughly.
The soil around my current house had a very high clay content when I first started to plant my garden, but I know it is improving with soil amendments, judging by my toadstool barometer. Toadstools and edible mushrooms only like to grow in good, rich soil!
When planting a potted rose, as well as a bare root rose, I have what I call my
parfait theory. I visualize what a parfait looks like: layers. The bottom of my
hole has sand, peat, soil, and a couple of chopped up banana peels (Iknow that sounds confusing but I will start a rose with banana peels because I am digging a pretty big hole and they are at the very bottom, not just dug in a couple of inches around the top of the soil.) That is the first layer. Then I alternate layers of soil and peat until I reach the halfway point and I place my potted or bare root rose in my new hole.
If planting a potted rose, I like my rose to be at the same level as it was in the pot, and if
bare root, I like my crown (looks like a knob to me) to be at soil level. If
planting a bare root rose, I am careful to make sure that the roots are supported
from underneath with enough dirt, as well as being careful not to break, stress,
or crowd the roots rather than enlarge my hole if necessary.
(Please note that if you are planting bare root, it is important to soak the roots 12 to 24 hours in a bucket of water out of the sun. I like to mix in a little liquid seaweed or whatever liquid humus I have around to that bucket of water to give a little more of a boost. )
After I have reached my “halfway parfait” point, I water the rose and the hole a
bit. I water in approximately one half of a gallon of water with seaweed extract or my Irish Organics Humic. I do this to help cut down on potential transplant
shock. The water should soak in quickly, and I finish off my parfait layers,
alternating between soil and peat moss.
My top layer is always peat moss. After the parfait is complete, I dig in about a quarter to one half a cup of a granular (or liquid) rose food in a circle around the bush, depending on the size of the bush and the directions on the package. Then I water in about another half-gallon of water. I will note that if you are against granular rose food with insecticide and fungicides in it, David Austin Roses makes a very good granular rose food.
Finally, I mulch well, leaving my five-inch magic circle from the base of the
plant. The magic circle is only peat at the top so my rose breathes properly.
Roses should ideally get a good solid one inch of water once a week. If I have
just planted a bare root rose with no growth, I sometimes mist the canes with water
once a day, preferably in the morning before the sun is high. (I say sometimes, because sometimes I forget!)
Except for new plantings, roses should be fed once a month as they are heavy
feeders. The new plants are not fed again for five to six weeks after initial
planting and feeding. Then they go on the regular schedule.
As the season progresses, I do keep my rose beds clean, discarding dead and fallen
leaves, etc. I am a believer in preventive, albeit judicious, spraying. If you are a sprayer only spray early in the morning (before 7 a.m.) to avoid causing my leaves to burn in
the sun. I have learned if a rose is purported to dislike spraying (some Old Garden Roses and Rugosas come to mind, for example), PAY ATTENTION! I have exfoliated a bush or two in my past spraying career! (Another “live and learn,” I suppose, but well-learned.)

I also do NOT ever reccomend homemade remedies of soap and baking soda and Listerine and whatever other fakakta sprays people think are so much better. They aren’t. They are kind of like the whole spraying vinegar and whatnot to get rid of weeds. People do not seem to get how bad that is for other plants, the soil, your pets, humans, and wildlife. Plus you can fry your plants in the heat of summer by spraying
For diseases like rust, blackspot and powdery mildew I used to spray when needed. But then I discovered drenches which are much easier on the rose. I use Cease Microbial Fungicide and Bactericide, which is OMRI Listed, by BioWorks. You can buy it from Amazon and other places. It is expensive but worth it. One of my other horticultural mentors taught me about using a biofungicide. It also is marvelous when I have to deal with daylily rust.
Cease is a aqueous suspension biofungicide with proven effectiveness in controlling a wide array of both fungal and bacterial pathogens, while providing outstanding plant and environmental safety. Based on a naturally occurring, patented strain of Bacillus subtilis (strain QST 713).
Cease Microbial Fungicide and Bactericide can be used as a foliar spray and soil drench on ornamentals, trees, shrubs, flowering plants and greenhouse crops and vegetables grown under cover. It is a broad spectrum biofungicide targeting common fungal and bacterial diseases such as Botrytis, Pseudomonas, Xanthomonas, Erwinia, Powdery Mildew, Leaf Spot and Speck, Anthracnose and Rust. There are other biologic fungicides out there, but Cease is what I use.

For the pest problems like aphids and their ilk, I use a horticultural oil spray like Neem or something with Pyrethrins. Sprays with Pyrethrins are the best things to control outbreaks of white fly. When the weather gets too muggy, hot and humid I do not spray. I used to use a rose dust, but a few years ago I decided that skeeved me out and settled on another drench. The one I discovered by accident and use VPG/fertilome’s Tree & Shrub Systemic Insect Drench.
This insecticide drench controls most bugs I can think of that will bother my roses, perennials, and shrubs. As a drench, it is watered in (I have a special watering can I use ONLY for drenches). The product is mixed with water, dissolves in water, moves down through the soil, and is absorbed by the roots. You drench the plant at the base, the root level. It is NOT like a spray so you don’t hit the above ground plat at all. Once absorbed, it moves up through the tree or shrub, providing year-long protection even into new growth. It contains Imidacloprid and provides 12-month Systemic Protection. Again, I discovered this completley on my own. My most pervasive rose pest seems to be borers and it has helped with them.

Look, I am a cancer survivor. I do not like using chemicals. But sometimes you just have to in a controlled manner. I have a lot of time, money and sweat equity involved in my garden. I will treat it right. A website which helps find biologic alternatives is Forestry Distributing. I discovered them by accident when trying to learn in terminology I could understand what biologics did and how they worked.
I have also discovered that other old wives’ tales have some truth to them: planting pungent herbs are natural pest repellants. Plants in the edible Allium family
are repugnant to aphids. Planting chives and garlic in and around my roses along
with lavender, rosemary, sage and thyme has dramatically cut down my personal
aphid population. I also plant purple sweet onions around and near my roses and other plants aphids like. I buy the starts in the spring.
Old wives tales also say that parsley planted near the feet of roses makes your roses smell sweeter. I don’t know it THAT is true, but hey! why ruin a good thing? I do it anyway! I can also tell you that it is very true that strawberries and roses get on well together.
I experiment every year with at least one new companion plant for my
roses. If they crowd my roses or I don’t like the effect, I simply move that
companion plant to a new location! I don’t like to ever waste a good perennial,
bulb, shrub, or herb. My garden is definitely a layered one and is reminsicent of an English or Irish cottage garden.
Well, there you have the thumbnail version of my rose routine. It works extremely
well for me, and I hope I have helped. All of the photos of roses were taken by me and are my actual roses from my garden. Happy rose gardening!


 Today was the summer get together and meeting for the Delaware Valley Hosta Society.
 The extra special treat today is we were hosted by Jenny Rose Carey and got to tour her beautiful Northview Gardens.
 Ms. Carey is the Senior Director of Meadowbrook Farm , which is now a Pennsylvania Horticultural Society (“PHS”) site, but was once the home of Liddon Pennock.
 Jenny Rose Carey is a well known garden lecturer and she practices what she preaches at her own gardens which were amazing.(
 Northview Gardens is a very cool place with an interesting Philadelphia history. As
  The gardens are fun and full of whimsey along with beautiful plantings and plant specimens. Of special note would be the amazing trees including Japnese maples like few have ever seen. Also lots of very cool witch hazels, and a beautiful allée of golden redbuds.
 I hope to go back at a future date to explore the gardens further. They are truly unique and inspirational.
  Northview gardens are beautiful but not fussy. To me they are also a very British garden style, which I love.
 The gardens are seperated into what can only be described as different “rooms”, and like a well organized house, each garden room melds and flows into the next.
 But again, the gardens are narural and not fussy. They are gardens which beg you to explore down the next path, yet are so comfortable and welcoming. There are lots of seating areas. Lovely vintge and antique garden seating.
 And they have fabulous garden building structures like a she shed and a potting shed.
  You can always tell when gardens are created with love, and these gardens are no exception.

 An approachable and engaging speaker, I was thrilled to learn that a lot of her favorite shade garden plants were also mine! She said with regard to shade gardening, that “slow and steady wins the race.” I was interested to hear that because I never really had a lot of shade gardening to do before we moved into this house. So I have learned in part by trial and error, but I was happy to learn that my gardening instincts have been good.
 She went through a wonderful list of plants that are also good companions to hostas. Plants like:
 Shade gardening is so very different. It’s softer, it meanders. It’s not perfect and it evolves over time. Or, this is what I have learned over the past few years and really getting into it for the first time.
 The ideal shade garden to me is something less formal, less structured. My gardens go into the woods. And I keep trash and what-not out of the woods and remove invasive plants like burning bush when they pop up, but for the most part I let my woods be. I don’t want to overly clean up my forest floor, because what hits the ground is sanctuary for critters and disintegrates into making good things for the soil (fallen leaves, etc.)
 Ms. Carey also encouraged people to have little seating areas. Paths. Water features, as in even a birdbath.
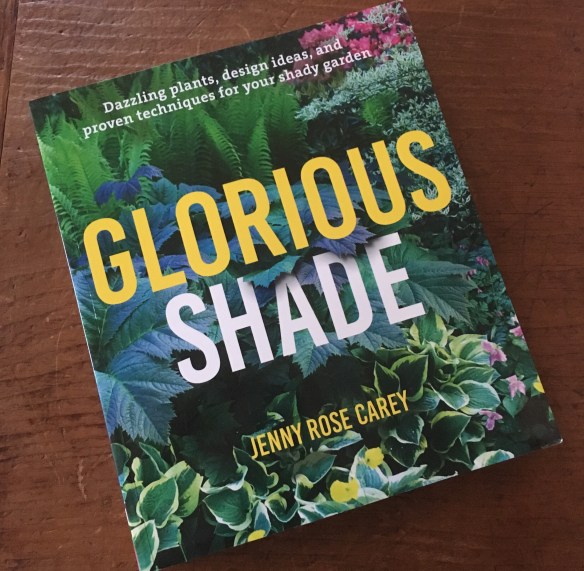
 So today was a great day. While not actually in the garden much, I love having the opportunity to meet and spend time with other gardeners and listen to a great gardening lecture. I also came home with a new gardening book and four spectacular hostas!