the evolution of apple-pear butter

I love Apple Butter and Pear Butter. Snd I like to make a hybrid cross mix of both in the fall. I always have. Maybe it’s my Pennsylvania German heritage shining through – my maternal grandmother was Pennsylvania German and I learned how to make a lot of things from her.

I have been reading various recipes on the Internet and decided to try making my apple pear butter in the Instant Pot.

I have an 8 quart Instant Pot. I cored apples and pears. I cut them into chunks of a fairly even size, and filled my Instant Pot to just below the “max” line.

I know, I know that isn’t very exact for some of you home cooks but apple butter consists of apples cooked down….

I did not peel either the apples or the pears because when you make everything all fine with an immersion blender after the fruit is cooked it all is very smooth and lovely.

But let me back up. After the fruit was loaded into my electric pressure cooker, I added a quarter cup of orange juice, maybe closer to a third of a cup I wasn’t measuring too precisely.

To that I added half a cup of brown sugar, four cinnamon sticks, 1 teaspoon ground mace, 1/2 teaspoon ground allspice, 1 teaspoon ground ginger, 3 teaspoons ground cinnamon, a healthy dash of salt, and 1 teaspoon of vanilla.

The vanilla is a quirky thing I read about it in a recipe when I was researching this and I thought I would try it and it ended up working out well.

Anyway give everything a toss within your Instant Pot to make sure the apples and pears are kind of coated.

Set your Instant Pot to the manual high pressure setting for 9 minutes. The valve should be at the top sealed position. When time is up, turn off the machine and allow the natural pressure release to occur. That will probably take a good half hour or so. I didn’t time it exactly.

Meanwhile make sure your canning jars are properly prepared and sterilized and get your big pot ready for water if you are doing a canning bath.

When your pressure cooker is de-pressurized and it is safe to remove the lid, take off the lid and remove the four cinnamon sticks. Using your immersion blender, blend the fruit until it is smooth and seamless.

But wait, it’s not ready yet here’s the next step.

Turn your Instant Pot back on to the sauté setting and adjust the sauté setting to LESS. Simmer the apple pear butter for 30 to 40 minutes until the apple pear butter is thickened and at your desired consistency. Most recipes I studied suggested 15 to 30 minutes but I actually did 40 minutes today to get it where I wanted.

I will caution you to stick around in your kitchen with a silicone spoon or spatula. You will need to stir it occasionally while it’s continuing to cook down or it will stick to the bottom of the Instant Pot.

When you think it is thick enough and cooked down enough, turn off your machine and allow the apple pear butter to cool down. I basically ignored it for a good hour.

At that point you can jar it up and either do your canning bath or store in the refrigerator. I did the canning bath because now that I have gotten the hang of it it really is my preferred way of dealing with preserves and chutneys and things like this.

I will leave my jars sitting on a wooden cutting board on the kitchen table until they’re completely cool and then I will add the labels and the date I made the apple pear butter. I made six jars. Not big jars – small jars and two taller skinny ones – see the photo at top of the post.

Making apple pear butter is one of those fall things. It’s definitely something that fills your kitchen full of false spice smells. And I do tend to combine both fruits when I make it.

You can serve apple pear butter on toast, bagels, English muffins, cheese and crackers, pork roast, all sorts of things.

I will note doing it in a pressure cooker reduced the time spent canning considerably. I think I am going to research other kinds of preserves and even chutneys to see what else I can make and can via the Instant Pot.

Try it!

swedish meatballs….my way

I love old school recipes.  One from my childhood is Swedish meatballs.  Not because we had any Swedish heritage – it was just one of those dishes my mother would make for us.  Over the years I have tweaked a basic recipe to suit me.

The weather has finally turned crisp and fall-like so I thought tonight would be a good night to dust off the recipe and prepare Swedish meatballs.  My recipe is NOT made with heavy cream and I add mushrooms and a couple of other herbs/spices. But the flavors work and you get that old school Swedish meatball flavor…enhanced.  Some add caraway seeds to either the gravy or meatballs, I add celery seed to the gravy

I also do something that I doubt anyone else does – I will prepare the meatball mix ahead of time the day I am cooking and refrigerate until it is time to make the meatballs.  That allows the spices to meld and perfume the meat mixture better.

Panko bread crumbs are superior to regular bread crumbs in my opinion, but the most important thing to remember is to use PLAIN breadcrumbs. This is not the recipe for flavored breadcrumbs.

Some use mashed potatoes, I like wide egg noodles.

I hope you enjoy my recipe if you try it. Watch the salt you add because of the sodium in most broths.

Swedish Meatballs My Way

  • 1 pound meatloaf mix
  • 1 1/4 cup panko bread crumbs
  • 1 tablespoon parsley, chopped
  • ½ teaspoon ground allspice
  • ½ teaspoon ground nutmeg
  • ½ cup onion, finely chopped x 2 or 1 cup
  • ½ teaspoon Garlic Powder
  • ⅛ teaspoon White Pepper
  • ½ teaspoon sweet paprika
  • ½ teaspoon salt
  • 1 teaspoon dried mustard powder
  • ½ teaspoon cumin
  • 1 teaspoon celery seed
  • Splash of buttermilk
  • 1 teaspoon dill
  • 8 oz package baby bella mushrooms slices thin
  • 1 egg
  • 6 tbsp. olive oil
  • 5 tbsp. butter
  • 3 tbsp. flour
  • 2 cups beef broth or bison broth
  • 1 cup evaporated Vitamin D canned milk (also great for homemade macaroni and cheese) or half and half
  • 1 Tablespoon Worcestershire sauce
  • 1 tsp. Dijon mustard
  • salt and pepper to taste
  1. In a medium sized bowl combine ground beef, panko, parsley, allspice, nutmeg, onion, garlic powder, white pepper, cumin, paprika, mustard powder, dash of buttermilk, salt and egg. Mix until combined. Put in refrigerator and chill a couple of   I do this because meat mixture flavor deepens.
  2. Roll into  20 + small meatballs. In a large dutch oven heat olive oil and 2 Tablespoons butter. Add the meatballs and cook turning continuously until brown on each side and cooked throughout. Transfer to a plate and cover with foil.
  3. Quickly sauté ½ cup minced onion and baby bella mushrooms
  4. Add 4 Tablespoons butter and flour to skillet and whisk until it turns brown. Slowly stir in beef broth and milk. Add Worcestershire sauce and Dijon mustard and dill and bring to a simmer until sauce starts to thicken. Salt and pepper to taste. Add a small dash of nutmeg (I mean small!) and celery seed.
  5. Add the meatballs back to the skillet and simmer for another few minutes. Serve over egg noodles or as the Brits call it, a “good mash” or plain mashed potatoes. I prefer egg noodles.

simple summer salad

Simple summer salads are the best thing in the world. Produce is at it’s peak, herbs are fresh, and it doesn’t get better than that.

One of my favorite summer salads are fresh tomatoes, a cucumber, red onion, and a combination of Italian flat leaf parsley, fresh dill, Italian basil and a simple vinaigrette. If I have a sweet red bell pepper I will often add that as well.

To make the vinaigrette it is equal parts olive oil and balsamic vinegar in a small canning jar. Add salt and pepper to taste, garlic powder, and 1 teaspoon of sugar.

When I make vinaigrette for a mixed greens salad, I will add Dijon mustard to the above mix.

You can see the size I mean in the photo above. You will only use maybe 3 tablespoons of dressing on the salad, but save the rest for regular lettuce salads and just refrigerate.

Peel and cut your cucumber in half lengthwise. If it is not the English hot house burpless variety, remove the seeds.

Toss cucumber into the bowl.

Slice and rough chop fairly thin about half of a large red onion.

Add onion to the bowl.

Take your tomatoes, cut the core out, and slice into large bite-size pieces. Sort of small wedges. Small enough you don’t need to use a knife to cut your salad, but large enough that the tomato doesn’t disintegrate.

Chiffonade the basil leaves. In layman’s terms, that means gently roll up your basil leaves and create thin ribbons by cutting off “slices” of the rolled basil.

Rough chop the Italian flat leaf parsley, and do the same gently with the fresh dill.

Put all the herbs on top of the salad and give one light toss and then add literally 2 to 3 tablespoons of the salad dressing and mix gently and either serve or cover and refrigerate until serving.

And I almost forgot — fresh ground pepper and sea salt to taste!

Leftovers are good for a day afterwards, provided you refrigerate.

This is a totally simple, easy to make salad, and it’s delicious! Thank you to my friend Sara for giving me vegetables from her garden. The herbs in the salad came out of my garden!

Bon appétit!

corn bread….with fresh corn 🌽

Corn Bread made with fresh corn.

Yum.

It’s an easy solution to not wasting corn on the cob that you may have cooked but not buttered and eaten. It also makes your cornbread not as dry as normal cornbread can be and adds a layer of flavor/texture.

It could not be simpler to make:

1 cup of white all purpose flour

1 cup cornmeal (Mine came from Anselma Mill)

1/2 teaspoon salt

1 tablespoon baking powder

Dash of powdered ginger or cinnamon (but not together)

1 cup whole milk

2 eggs, beaten

1/4 cup melted butter with 2 tablespoons bacon grease

1/2 cup sugar

1 cup fresh sweet corn cooked and drained

** The wildcard if you want to spice it up is to mince one fresh jalapeño pepper and add it to the batter

Preheat oven to 400° F and really grease a 9″ x 9″ baking pan (I use butter.)

If your fresh cooked corn is still on the cob use a knife and take it off the cob. Let it sit in a strainer over a bowl so any additional liquid drains out.

Mix together all dry ingredients.

Stir in all wet ingredients.

Stir in fresh corn, and if you are using the wildcard minced jalapeño this is where you add that as well.

Do not over mix or your corn bread batter will be tough.

Before you add your batter to your pan put the greased pan in the oven for 2 or 3 minutes.

Pour batter into the pan, and bake at 400° F for 25 to 28 minutes.

It might be baked sooner — so you might want to check it with a toothpick or a skewer and see if it comes out clean from the center of the pan. I have gotten pretty good at eyeballing it over the years, so if the edge of the cornbread has kind of separated from the pan and it’s a nice goldeny color— it’s done.

Cool enough to serve warm, or eat at room temperature. Make sure you wrap leftovers tightly or it will dry out.

Enjoy!

savoring summer

Summer always means fresh pesto sauce. And fresh pesto is totally easy to make.

All it is is olive oil, huge bunches of fresh basil, salt to taste, fresh garlic cloves, a pinch of thyme, a sweet onion, a dash or two of balsamic vinegar,and a red bell pepper if you have one laying around.

Today I probably used about a cup and a half of olive oil. I easily used four cups of fresh basil because my plants need it to be pruned.

You blend it all together in a food processor or blender and you let it sit in the refrigerator to chill so the flavors meld. When you go to heat it up with pasta you can add pine nuts and grated fresh Parmesan cheese. I also like to sauté chicken tenders and add that to a pesto and pasta dish.

People also use pesto sauce in vegetable soups like tomato in particular. Some people also like to add anchovies and sun-dried tomatoes, but I don't really care for that taste combination with pesto sauces .

Often homemade pesto will not be as thick and gummy as store-bought pesto sauces but those sauces have thickeners and / or preservatives in them. I love homemade pesto sauce, store-bought not so much.

I will also note that I saw the "West Chester Food Co-Op" is advertising a Gazpacho Adaluz (I put them in air quotes because they aren't a real bricks and mortar store they are just a booth I don't understand at the West Chester Growers Market. ) So I thought I would remind my dear readers that I shared such a recipe with you five years ago. It is called Kendall's Gazpacho as it is named after my late mother in law who bought the recipe back from Spain many decades ago.

Click here for the recipe to Kendall's Gazpacho. and the photo you see below is a batch of the gazpacho I made recently. The color of the soup is determined by the color of your vegetables. So when I use green bell pepper it stays green. When I use an orange or red bell pepper, the soup takes a red or orange hue. This is different from other gazpachos and doesn't actually have as many tomatoes as you would put in one of those.

Anyway I hope you make yourselves a batch of pesto and/or gazpacho before the end of the summer. The flavors of fresh vegetables this time of year can't be beat!

Thanks for stopping by my kitchen.

summer recipe back to basics: purple coleslaw


I have been remiss. I haven’t blogged any recipes lately. This evening for dinner we were grilling marinated chicken thighs and my neighbor had given me a beautiful head of purple cabbage so I decided to make coleslaw.

Here is the recipe:

Purple Cabbage Coleslaw

Ingredients

4 cups grated purple cabbage 

1 cup grated carrots

1/2 grated large vidalia onion 

6 heaping tablespoons mayonnaise

2 tablespoon prepared Dijon mustard

5 tablespoons organic cane sugar (Turbinado)

1/3 cup apple cider vinegar 

2 tablespoons fresh minced dill

Freshly ground salt pepper, to taste

2 tablespoons extra virgin olive oil 

1/2 teaspoon ground cumin

Directions

I read somewhere once that purple cabbage is really good for you. A super food full of antibiotics, vitamins, fiber, and other good stuff. I think it also makes a tastier coleslaw. I also add vidalia onion to my coleslaw and fresh dill to the dressing, which I think keeps it fresh and different.

First finely grate cabbage, carrots, and onion. My “Pro Tip” here is I put these vegetables into a fine mesh strainer after grating and set them over a bowl and press gently for some of the extra liquid to drain out.

Mix the cider vinegar, sugar, cumin together. Unless you want a grainy dressing, make sure the sugar is fully dissolved before proceeding and adding the mayonnaise, dijon mustard, olive oil, and fresh dill. Whisk the dressing together briskly and refrigerate for a few minutes.

Next put your veggies in a clean bowl and pour the dressing on top of it. Mix well and then use a little spoon to taste and adjust for salt and pepper as needed. I like fresh ground pepper in coleslaw.

Refrigerate at least an hour before serving.

Enjoy!

rainy day chili

chili

One of the ladies in my cooking group asked for my rainy day chili recipe, so here it is:


Brown 1 lb ground pork and 1 lb ground beef with 6 cloves of garlic diced and 1 sweet onion and 1 red onion chopped.   Salt to taste.


To that add 4 grated carrots (medium carrots), and 1 1/2 cups grated raw potatoes (red bliss or Yukon gold).


Add one package frozen corn (no sauce kind – just the corn).


If I have green or red bell pepper I will chop up one of those too.


Add 3 Tablespoons Chili Powder (I use hot), 1 teaspoon Chipotle Chili Powder, 1 teaspoon Smoked Hot Paprika, 1 teaspoon bittersweet paprika. A few dashes of cumin.


Then add ¼ cup chopped fresh Cilantro and 1 Tablespoon dried oregano


Add one 40.5 ounce can of dark red kidney beans (or white cannellini beans which my grocery store has been out of)


Add one 28 ounce can of crush red tomatoes.


Add one 28 ounce can of tomato puree.


Add a few dashes of chipotle Tabasco sauce or a good Mexican hot sauce.


Bring to a slow boil over medium low heat and reduce to low/ simmer and cook the chili for a few hours until cooked down a bit (makes it thicker).


Simmer with a splatter screen on unless you want your kitchen to wear chili.


Adjust for seasoning here and there.  Chili cooked a day ahead and reheated is even better because spices have a chance to settle in.


it was just a day for quiche

23127011015_b6198c483e_o (1)I just felt like making a quiche and I had made a ham a few days ago, so I pulled out one of my Smithfield Barn vintage pie plates and away we went. And by the way, spend the money to make your quiche with Swiss and Gruyere cheeses…it makes a world of difference.

Here is what I made (my recipe):

Quiche with Ham and Portobello Mushrooms

6 large eggs

¾ cup evaporated milk

1 large shallot

1 small onion

1 8 oz package of baby Portobello or crimini mushrooms sliced thin

2 tablespoons butter

1 deep dish pie plate and one pie crust (I make my own crust or buy refrigerated pie dough in a pinch – don’t like frozen pie crusts)

2 ½ cups shredded cheese – half Swiss and half Gruyere

About 2 cups of minced up ham

Worcestershire sauce

Tabasco sauce


  1. Preheat oven to 400°.
  2. Sauté onion, shallot, mushrooms and ham in 2 tablespoons of butter. Add a little salt and pepper to taste. Set aside.quiche fixings
  3. Beat eggs in a large mixing bowl.
  4. Add milk and mix well. Add a couple dashes of Worcestershire sauce and Tabasco.22708578528_dd9d321aaa_z22708494837_30b4350096_z
  5. Place sautéed mixture into pie crust. Then cheese. Finally pour milk and eggs mixture over top.
  6. Place quiche on a baking sheet and bake on the middle oven rack for 15 minutes at 400°, and then reduce heat to 350° and bake another 30-32 minutes.23127011385_63dc503a55_z

When toothpick or knife comes out of quiche clean, it’s done. Allow to cool at least 25 minutes before serving.


Enjoy!

22504252134_99809fe008_o


canning season

  Becky Home Ecky has taken me over the past three weeks. I have been canning apple sauce, apple butter, pear butter, pickled watermelon rind with red onion, and garlicky bread and butter pickles with jalapeño peppers. The apples and pears I picked myself out of the gardens of friends, and this year everyone seems to have a bumper crop of apples, especially.

The recipes mostly came out of my head and memory of canners past but I used the Blue Chair Jam Cookbook, Simply Recipes, and Ball’s website for added direction on procedure and proportion.

  I have memories of my mother canning and making preserves and her mother, my grandmother, and my late cousin Suzy.  My grandmother would pickle and preserveanything that stood still long enough, and she was an amazing cook. I remember my mother pickling okra and green tomatoes and I also remember her making peach preserves when my parents’ friend Charlie Peterson gave them a big bushel of peaches when I was little.

My mother’s German friends Susi and Babette were canning wizards. I remember all the things they made, pickled, and preserved. When you were in the kitchen of Babette’s farmhouse  in the fall you could hear the sauerkraut popping in their stone crocks in the basement.

  
And I also remember my great aunts on Ritner Street in South Philadehia doing a lot of canning too. They had essentially an extra kitchen in the basement and I remember them pickling and canning what came out of my Aunt Rose’s large kitchen garden in Collegeville.  
  
My Aunt Rose and Uncle Carl had this big old house with sweeping grounds that backed up to a farm when I was little. The farm had horses near some apple trees that would stick their heads over the fence looking for a pat (and some apples!)…my cousin sold the property after my aunt and uncle passed away and by that time (after 2000) where they once lived had stopped being country long ago, and was obscenely over developed.
  My great aunts would mostly can tomatoes and made these pickled hot peppers that would bring tears to your eyes. I remember the jars of canned tomatoes all lined up one after the other all in a row. It actually looked really pretty.

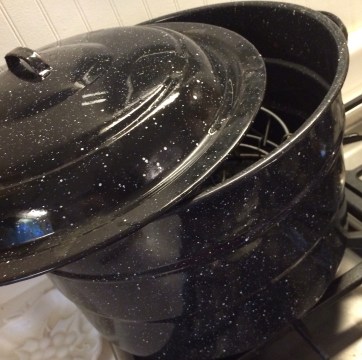
  I had a lot of fun doing my canning with the exception of a minor kitchentastrophe. I singed my backsplash behind my stove top when my giant 21 quart enamel pot I use for the canning water bath was off center on its stove burner.

My kitchen was filled with the smells of childhood.  The vinegary garlic spice odors of making a pickling brine. And the sweet smells of apples and pears cooking  in cinnamon, cardamom, ginger, nutmeg, star anise, and turbinado sugar.  They were wonderful smells and truly sensory memories.

  But last evening when I had finished placing my last batch of applesauce in the canning hot water bath, I was ready to be finished. Canning is actually pretty hard work, even if it’s fun.  Your arms ache by the time you finish pushing hot fruit through the chinois  before the final cooking stage. It made me realize how hard women used to work putting up food for their families to last all winter long.  

  A fun fact is canning dates back to the late 18th century France.  Canning food in unbreakable tins was an English invention from the early 19th century.

I am pretty much a novice at this culinary art form. I am not as nearly accomplished as some of my friends and neighbors. I am sure as I do more canning I will become more adept. 

  So now all I have to do is finish labeling and dating  my final couple of batches and put it away.

Thanks for stopping by.


new spin on summer salad staple

 So bean salad is a summer staple. One bean, two bean, three bean and more.

I decided to change it up. I took half a bag each of Goya dried navy beans and pinto beans yesterday and put them in to soak with salt and water overnight. I then cooked them according to directions on their packaging this morning.

While the beans were cooling I minced three large cloves of garlic, chopped fine one large red onion, chopped one fresh red bell pepper, peeled and chopped one fresh cucumber, and tossed into a bowl.

To that bowl I added salt and pepper to taste, 3 tablespoons of white table sugar , a bunch of fresh dill chopped, and a third of a cup of Italian flat leaf parsley chopped.

I mixed the salt and pepper, herbs and spices, along with the vegetables and drizzled olive oil and rice wine vinegar and red wine vinegar over the top of it and stirred some more.  I always add more vinegar than oil to bean salads.

I should’ve measured exactly how much oil and vinegar but I didn’t I’m sorry- you want basically enough that your salad gets coated and sort of pickled  but not enough that it swimming in dressing.

Last but not least I tossed in the beans which I had drained and mixed everything together, as well as adjusted for salt and pepper. I will now chill the salad down until this evening but it looks beautiful and tastes terrific!